Wednesday, January 22, 2014

Scrapbooking Athens

Even though I went to Athens, Greece back in 2012, I'm finally done with the photo album!

For the first page, I selected a paper pattern the included a journaling spot. The page was embellished with  photographs of our hotel, a Greek flag, and a sticker titled Athens. I also added the front cover of my old Passport.


The second page featured the Temple of Zeus. This landmark was just a few feet away from our hotel. I used two matching sheets of rocky roman numeral paper for the background and plain tan paper to accent the photos. I added brown glass mosaic tiles as embellishments and added journaling on a layered frame die cut.


On the third page, I stamped a crackle pattern on brown paper to add some texture. The photos are of us going to see the Temple of Poseidon in Cape Sounion. I added a photo tab with some journaling and a hand drawn title. A few brown metallic tile stickers were added as embellishments.


I used a map print cardstock for this page. To frame the photographs, I used a crinkled up yellow parchment print. Both landmarks were very close to our hotel as well. I used a black alphabet sticker set for the titles.


These photos were taken on our way to the Parthenon. The background paper is a cracked mud print and I accented the photos with brown paper. I added some stickers as embellishments along with a real ticket from sightseeing. I added a flag shape as a journaling spot. 


This page shows us at the Parthenon. I used a yellow parchment print and rounded the corners of the pictures. I accented two of the photos with plastic pillars I found on Ebay. I topped the page off with some stickers as well as some brown metallic pearls. For the journaling, I used unmarked pages from my old Passport. 


Also located on the Acropolis is the Erechtheion. I used a crinkle metallic white pattern sheet for the background and accented the photos with squares of tan paper which I had stamped in a crackle pattern. I attached real marble mosaic tiles on each side and added a journaling spot using a film strip die cut. 


We just happened to stumble upon the Kerameikos ruins and decided to visit. It is an old potters village and cemetery. I chose an old swirly looking pattern for my background paper and added a second background paper of a grey print. The photos were then accented with a silver paper. I added some small metallic black tile stickers as well as some stickers from a Greece travel set. I added a small flag die cut to include some information on the site.  


These photos were taken at the ancient agora of Athens. I used a tan background paper and made my own photo corners. I used texture paste on some cardstock which I then stamped with my crackle design used on previous pages. When it dried, I painted them a soft brownish tan and then a darker color to highlight the pattern. I then used a die cut to cut out the photo corner shapes. I added Greek alphabet die cuts to spell out Agora. The journaling block is in the middle of the page. The corners were rounded and I added a metal brad which I thought looked like an old coin. 


The Stoa of Atallos is one of the most well preserved monuments. I used a tan paper which I thought resembled a tile as the background. The photos were glued on and accented with metallic gold photo corners. There is a border sticker of small circles on the left side. The name of the monument is spelled out in Greek on the bottom and a small section for journaling added on the top of the page. 


The Temple of Hephaistos is shown on this layout. I used a plain tan paper and chose a rocky pattern on which to mount the photos. I also chose to spell out this monument in Greek along the top of the page. I accented the title sticker with a circle die cut of the same paper used on the photo background and the flag shape used for journaling. I added a small world explorer sticker in the upper right as a final touch. 


These photographs were taken in the National Archaeological Museum. I chose a violet marble pattern paper for the background of the layout and accented with tan paper. I added a few rounded edge squares of metallic white crinkle paper for some extra texture. I used brown pearls to make the squares stand out even more. 


I chose to transition from the rocky, old monument pages to the city and beach photos starting here. I chose a plain white background and accented the photos with a fun blue stripe paper. I added some travel themed stickers and a rounded corner white block for journaling. I accented the journal block with the same striped paper, but oriented it the opposite way. 


These photos are just a few from being around the city. We stopped at many, many restaurants, parks, and shops. Almost every dinner we had was accompanied by wine and bouzouki players. It was awesome! To capture the 'Greekness' I chose a bright blue background and white for the photos. I added circle die cuts of a medium shade of blue as accents. I used a tag for some journaling and added stickers of the Greek flag, Plaka- which is the historic part where we stayed, and a Greek Food title. 


There was one day where we ventured over to the famous Constitution (Syntagma) Square. We visited the National Gardens and watched the changing of the guard. I chose a blue tile mosaic accent paper offset on a plain white background. The photos and journal block were mounted onto plain blue paper. 


For Mary's birthday, we spent the whole day lounging at a beach. The beach had perfect sand, blue water, and white umbrellas. It was absolutely gorgeous. I used a white and turquoise patterned paper as a background without matting the photos to anything. Instead, I accented the page and one photo with white ribbon. I added one tailor bow to the middle ribbon and a white journal spot. The title was  made from white alphabet stickers. 

We burned up an entire day on a cruise that dropped you off at three islands for a small excursion. We visited Aegina, Poros, and Hydra. We went swimming but mostly just walked around and looked at the amazing sites. 


For these two pages, I chose a light blue cardstock background and matted the photos on dark blue and white. The pictures were randomly placed so there wasn't a color scheme. I accented the page with a few travel themed word stickers, a sticker of some of the Greek Islands, and the three island names in Greek. It was a marvelous vacation!!!


Thursday, November 28, 2013

New Baby Birth Annoucements


These were birth announcements I made to send to my friends and family! The design is a blue 5x7 textured carstock with rounded corners and a dot embossed peek a boo window. It features a baby blue ribbon with a complementary layered wording plaque. I added the photo behind the peek a boo window. Everyone loved the idea!

More information is available from this link:

Monday, October 28, 2013

Scrapbooking 2012

I am finally finished with my year album of 2012! 


Here is my New Year's layout. I used a metallic silver background page and highlighted it with black and white accents. I used Lifestyle Crafts shape and tape black and white pages and cut out nesting pennant shapes which I layered with black glitter shapes. A silver alphabet sticker pack was used for the title. I cut out varying shapes with the same black and white design to accent the photos. To top it off, I added a strip of sparkly black ribbon. 

To celebrate my birthday, a bunch of us went out to a local Tiki bar. I used a Paper Studio's Beach pad (http://shop.hobbylobby.com/products/12-x-12-a-day-at-the-beach-paper-pack-275719/) design for the layout and added random colorful scrap pages I already had to accent the photos. I downloaded a Tiki Font for the title tag: Tiki Birthday Drinks. I added an eyelet and a string to the tag. I accented the page with random coconut and drink shaped stickers. 


Bowling for my friend's Birthday celebration! I used a photorealistic wood grain paper as a background. The main photo was made into a 5x7 and accented with a wood patterned stamp on white paper. I used red letters from a previous project for the title. I also accented the entire page with Lifestyle Craft's Bowling die. 


This page is one of my favorites! It is my brother in front of his Army vehicle. I used a green military star background page and accented the 8x10 photo with a burlap sack look a like paper. I added real burlap under the Brave and Proud stickers, as well as my journaling tag. I frayed the edges to make it look more rough and tumble. I downloaded an army man font in which I spelled out his rank and name. I topped the page off with Army Man brads from Eyeletoulet.com and muddy boot prints. 


I chose this purple floral Mother's Day paper from my stockpile. I added purple polka dot color blocks to accent the trimmed photos. Plain white tags were added with some journaling. I accented the page with a purple stamped 'Happy Mother's Day' and purple flower stickers. 


For my father's day layout, I chose to use brown. I have a plain brown paper as the background and accented it with a brownish colored paper from The Paper Studio's Natural Botanical paper pad (http://shop.hobbylobby.com/products/12-x-12-natural-botanical-premium-cardstock-pack-546846/) trimmed to 11x11. I added a strip of cork to accent the title block, which was made out of plain brown paper trimmed with a patterned scissors. I added remnant brown tile stickers from my collection and spelled out Father's Day with brown alphabet stickers. I attached a hammer and wrench brad, also from Eyeletoutlet.com. Finally, the title block was attached to the cork using screw brads I purchased at Hobby Lobby. 


Coming home from a show, my car broke down! I had to include this in my year. I chose a plain black background with red paper accents as the car is red and black. I used a leather-like photorealistic paper to accent to photo and rounded the corners. I purchased a black and silver alphabet to spell out the title. 


Some friends decided to tail gate and attend a Brewer's Game. I used a plain white background and used a nesting circles die set (http://weronthenet.com/Nesting_Dies) to create different sized circle photos, baseball paper, and plain red layers. I used the same dies to trace red circles on the white paper and used a marker to add 'stitch' marks as are on a baseball. I added a nonlinear title to complement the circle theme of the page. 


I used a lot of colorful birthday themed paper for this layout. I purchased all these 12x12 sheets from Michaels. I layered the photos onto randomly sized birthday candle paper which was attached to a rainbow and black happy birthday background. I used the same circle nesting dies (http://weronthenet.com/Nesting_Dies) to create the title half circle. I added stickers from my collection to complete the title. 


Girls night! This was one of my favorite pages to create. I used Lifestyle Crafts paper doll die cut with a sparkly glitter black dress. The background is a plain purple cardstock sheet accented with a purple leopard print page. I attached a small light purple side tab and added purple kiss stamps. I created a layered matching purple and black glitter journaling tag. The photo and photo mat, which is the same black glitter page used for the dress, were cut using Lifestyle Crafts nesting frame die set (http://weronthenet.com/Nesting_Dies). I added some clear and purple rhinestones to give the page some extra bling. I also added a girls night out sticker to the side. 


I visited my friend's son at daycare and we snapped some pictures of him playing in the toy car. To highlight the car theme, I chose car paper. I accented to photos with the car paper blocks and used a star die cut to cut out green stars. I further accented the page with a sun and pinwheel sticker. I used a light green sticker alphabet to create the title. 


My husband and I picked all Beatles songs for our wedding music. The Britons are a cover band, so we shared a dance at a local festival they play every year. I used plain purple cardstock for the background and a colorful star paper to accent it page. I cut out random die cut shapes and attached purple sparkle sticker letters to spell out the band's name. I trimmed and adhered the photos and added a small journaling tab at the bottom. 


This page features a green textured background paper that I don't quite know what it is supposed to be. But, it works for this! I added trimmed photos without any background or space. To accent the page, I added the car show's logo which was printed at home and then cut out. I used a nesting frame to create a journaling spot and added some beer mug stickers. After all, what's a car show without beer!


This page captures a two year old boy's birthday party. We all went finishing for ducks, so I picked a duck theme. The background is a plain sheet of orange cardstock. I cut out photo corners and duck shapes using Lifestyle Crafts shape and tape yellow papers. I also added the yellow present using the same paper. I used Lifestyle Crafts nesting doily to create the large circle in which I attached a clearance duck iron on I purchased from Hobby Lobby. I added a journaling tag which states, "woo hoo! Look who's two!"


This is one of my favorite pages! Here is our new puppy, Francis. This page uses a green woodgrain pattern for a background and a greenish-brown polka dot accent piece that I trimmed on all sides with a shaped scissors. I used a dot ribbon to create a 'collar' along the top and spelled out his name using small circles, that to me, look like collar tags. I cut out a bone shape to add some journaling. I added some dog stickers along the bottom of the accent page and created a texture paste paw print badge which I placed as the accent focal point. 


Here's Francis getting his first bath! I experimented with the bubbles and wasn't really able to get the look I wanted. I was hoping to use vellum bubbles so they would be see through, but any glue I tried to use showed through the paper. I ended up using Modge Podge on the whole circle. I used Lifestyle Crafts nesting circles for all the bubbles and the photos. I had an old water splotch sticker which I used as a background for the title, which I drew using big bubble letters and colored with colored pencil. 


This page was created with a The Paper Studio Halloween page kit I picked up on clearance from Hobby Lobby. I used a purple polka dot background and attached a smaller sheet of multi colored stripes. I created an 8x10 collage print at Walgreens.com and used that instead of gluing on separate photos. I accented the bottom of the page with black sparkly rick rack which are holding bat paper tags. I put pumpkin stickers over the bat tags and added the smiling pumpkin to the side. I used the Happy Halloween sticker as my title and added a journaling tag. 


Francis loves going to the park. While we got him in fall, he still had a few visits before winter. Here are some photos of him making new friends. I trimmed the photos and added them to orange polka dot paper which was glued to a leaf themed background. Both papers were from The Paper Studio's Natural Botanical paper pad (http://shop.hobbylobby.com/products/12-x-12-natural-botanical-premium-cardstock-pack-546846/). I wanted a fall theme instead of a dog theme so I created trees using the same orange paper as background for the photos. I die cut complementary letters and added them to the trees. The rest of the title is in the journaling block and reads "Puppy Playtime." I added a felt leaf to the journaling block as an accent. 


I stuck with a black and white theme for our first anniversary picture. The paper was from my stockpile and I cut a random sized plain black sheet for a photo mat. I added a white architectural photo corner underneath the picture as an accent. To attach the movie ticket, I used the Paper Studio paper clip embellishments. I added an embossed and nested frame die cut journaling block. 


I decided to include our holiday family photo to close out the year. It will make for a good tradition to track them every year. I also added a photo of Francis wearing antler ears because it was cute. I attached green ribbon to random sized red cardstock rectangles. These were used to accent the photos. I then added an embellishment tag and glittery red poinsettia stickers. 

Saturday, July 13, 2013

Handmade Father's Day Cards

This card captures manly essence!

I always struggle to make 'manly' cards. This one features a stamp on a painted piece of real wood that says You lead me, you guide me, you inspire me. Thanks, Dad. It has the tops of screw brads hot glued onto the wood and is glued onto a photorealistic wood plank paper. 

This item can be found in my shop, and has generally been one of my most popular products! 

Saturday, June 22, 2013

Handmade Pregnancy Cards


I waited until my mom's birthday to tell her my husband and I were expecting. I made her this unsuspecting blue Happy Birthday card which contained a coupon redeemable for one grandchild. I made it valid for +/- one month of my due date. She was really surprised!! It was such a fun way to announce the news!


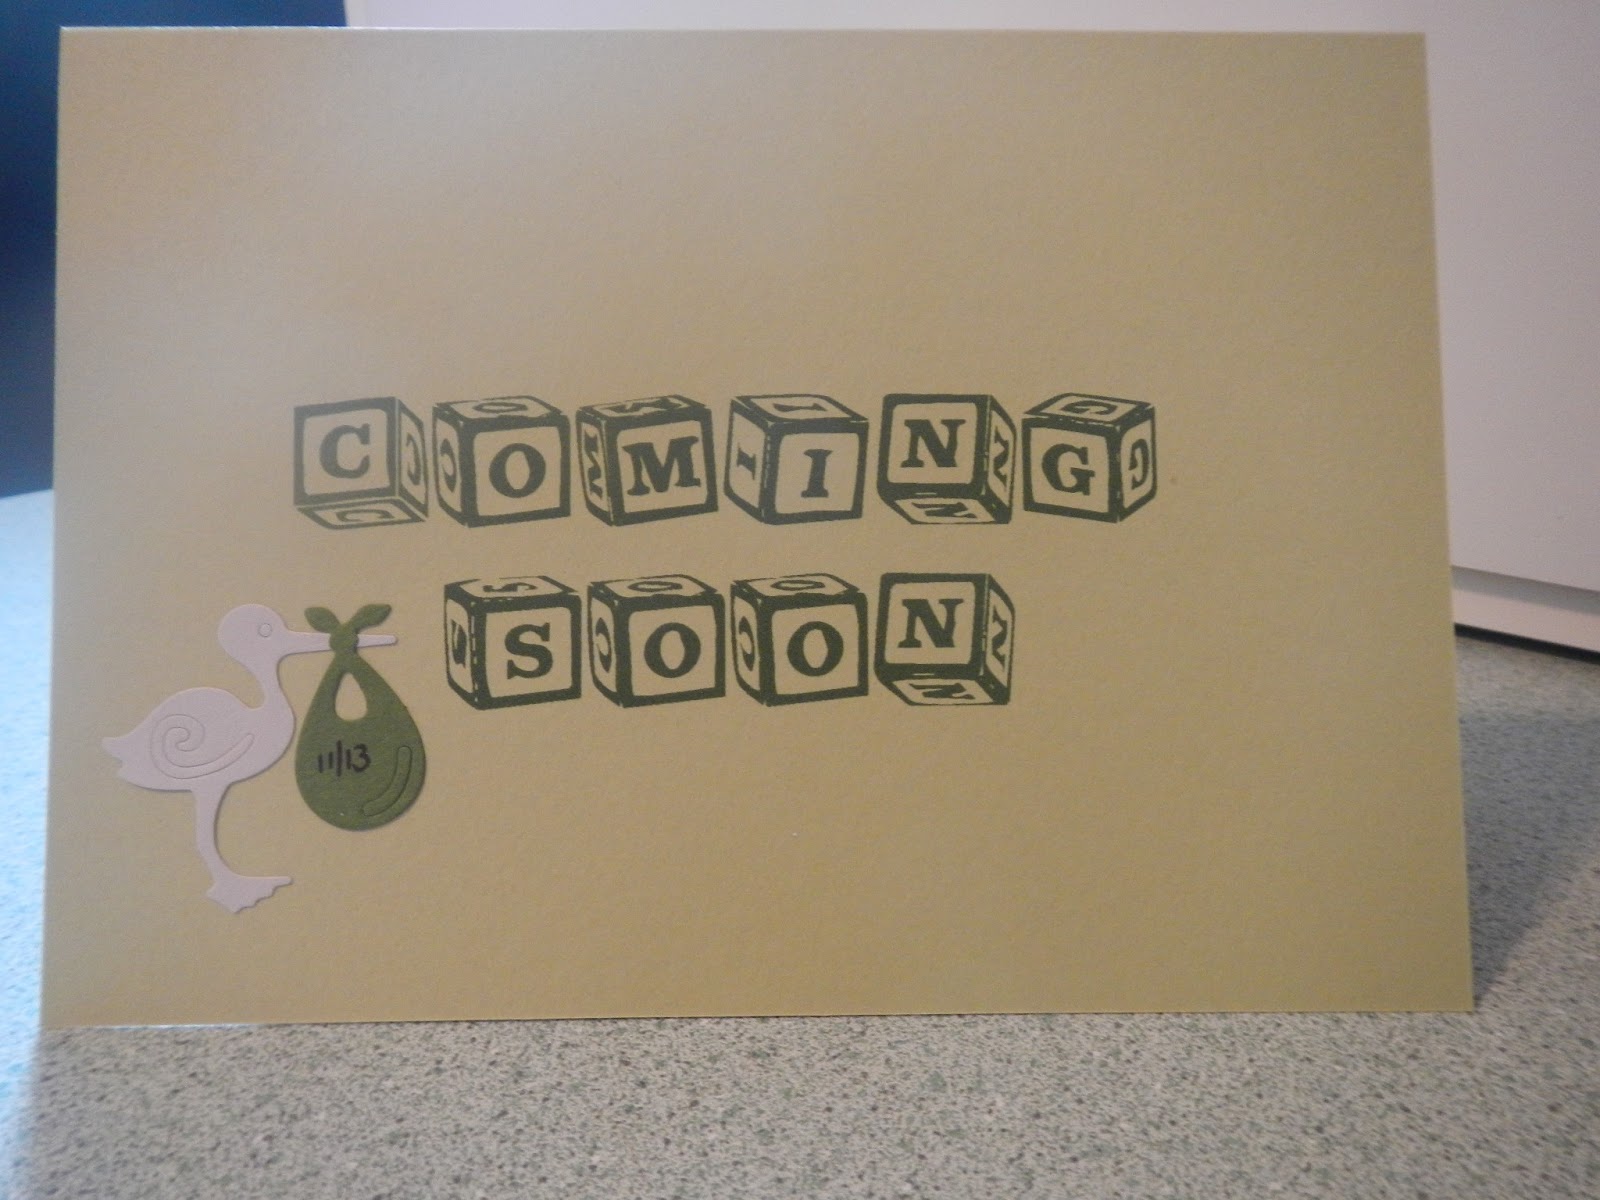
This was the formal announcement we mailed to friends and family. It is a tropical green 5x7 card with an orange swirl photo background. I accented the photo with a green ribbon and bow. The front features a baby block font and a stork with our due date in it's pouch. We chose green and orange to be gender neutral. This item can be found in my shop (https://www.etsy.com/listing/154709346/pregnancy-announcement). 


Sunday, March 10, 2013

Handmade Gift Card Holders

So, I bought a Sizzix gift card holder die. 


The first project I made, a Mother's Day card.  It is pearl pink paper with purple 'Happy Mother's Day' and cherry blossom stamps. It is accented with an EK success cherry blossom sticker. 


My second project: a Congratulations Graduate gift card holder
It has an embossed cursive congratulations stamp with a cap and tassel die cut. I embossed the fold tab with polka dots. 


To view this item in my shop:

I also used this die to create a handmade Father's Day gift card holder. I accented the front with a wooden stamp design. I added a die cut tool box and a small metal hammer and wrench. 


to view this item in my shop: